Decided to repost my crappy guide. Hope it helps anyone who reads it. Heres the link to the original crappy guide:
http://vindictus.nexon.net/Community/#/showthread.php?1550200-A-crappy-Niflheim-Guide&nxid=15Guide StartsShow casing move and giving tips and other info you may not know first going into these runs.
Side info:1.
EDIT: With the update you can now revive upto 3-4 time in niflheim hard mode per player
2. Normal mode you can revive as many time as you want.
3.
EDIT: Update has came and they increased the defense of all bosses from 9k to 11k also they removed the attack cap limit, also they should have added bracelet boxes to the drop pool of each boss. Also there should be a hirer chance of getting better component for the bracelets.
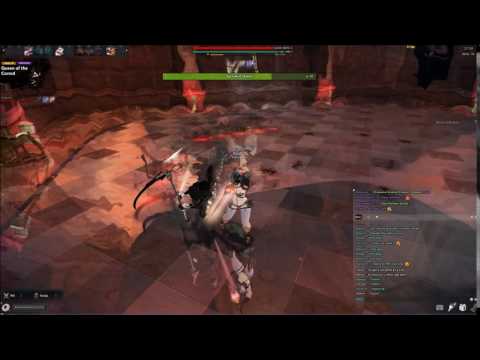
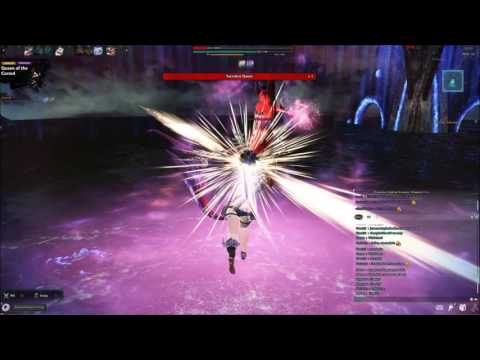
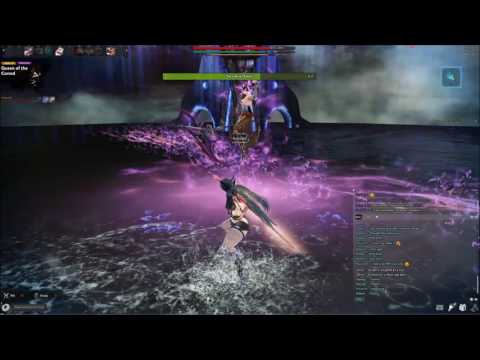
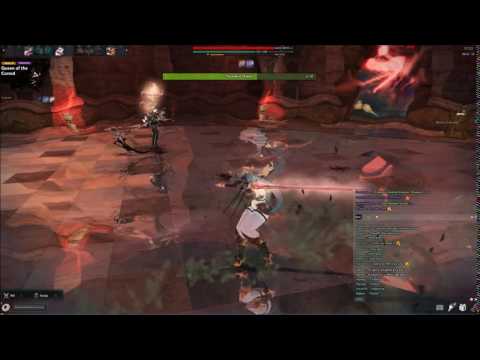
Succubus Queen
1. Intro 2. Upward Slash move
[spoiler]
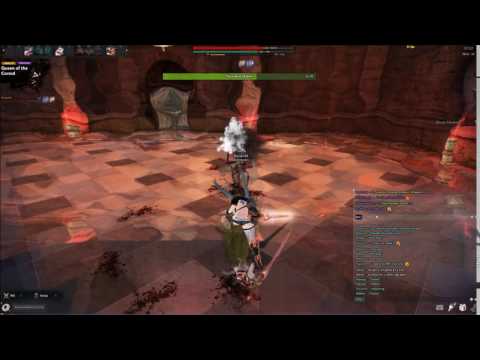
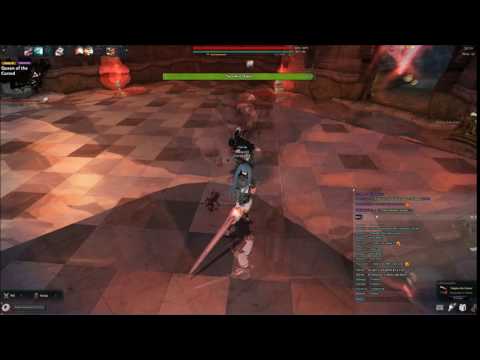 3. Two Hit Combo
 [spoiler]
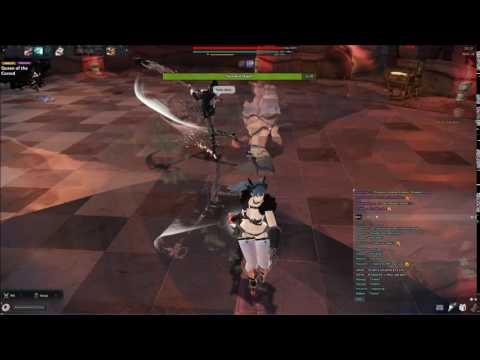 4 Single Drag Trail Move
[spoiler]
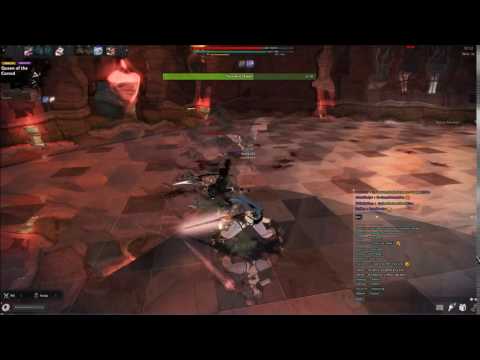
 5. Triple Drag Trail Move
[spoiler]
Note the trail (4 and 5) does continuous damage thus it is dangerous when using Slashing High or any Super armor move on top of it. This trail will take you from 100% hp to 0% hp is less then 1 second.
Character that have a really hard time with this move are Pillar Karok and Hurk thus if you see one of these two die instantly you knoiw why. All other character have Super armor skill as well, make sure you know where these are at and play accordingly unless you wanna insta die.
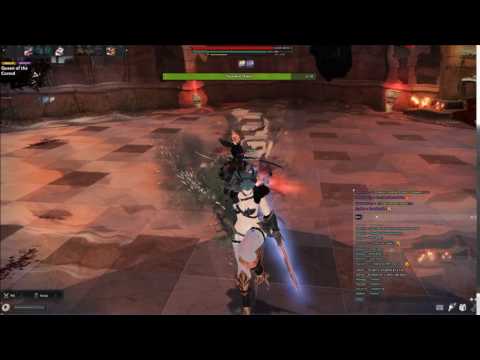
These projectile bounce around the room. When you dodge it'll bounce around the room and come at you a second time, these bounces make a small aoe. One way to dodge it is to dodge in then dodge back. For bow kai you can simply walk around it, practice it(I don't play kai but i see them doing this when i run it with them).
For character with block, you can just block the attack and it will disappear.
When it hit you, it'll disappear.
During the first phase it'll randomly fly toward a player. During the second phase, it'll have 4 projectile that'll target 4 players or aggro things or any combination there of.
She has some iframe during this move.
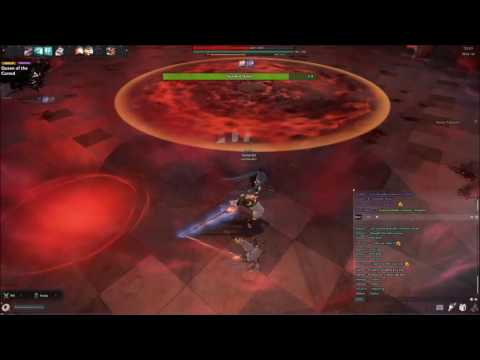
She'll Teleport to the middle and create an expanding circle then disappear. During this attack she'll create 4 circle around 4 player or things that grab aggro. Then she will randomly teleport to a player or thing that take aggro.
Don't go into the expanding circle in the middle it does continuous damage and can kill you fairly quickly.
There a few way to dodge this move, one is to jog around the room while dodging every so often,
good for solo play. Another way is to walk out the circle then dodge back in
good for solo and party play. Last is to go to a corner and iframe the circle that appear bellow you
work great in solo and party play.Thing that can grab aggro from the circle on the floor, Evie wisp, Evie pistol, bear pet.
Start once you get her bellow 8 bars. Has all the same move as the first phase except for the mechanic.
All the walls during this phase teleport you to the opposite side of the room.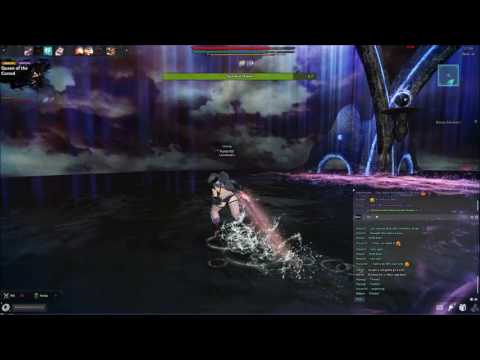
She create two lasers that makes a cross shape.
To avoid this you run to the direction opposite each of the lasers. First you run opposite one lasers running through the wall to teleport to the other side then do the same for the second laser, this is the easiest way to avoid this attack.
You can also use iframe moves to go through these laser. For this one you going to need a decently long iframe move to make it work. Try it out with your character to see. Fiona can just shield charge iframe this for extra damage.
She make a diagonal laser that goes across the room diagonally.
Simply just run to the wall at the proper timing, this is the easier move out of the 3 mechanics.
You can iframe this but it just better to just run to the wall unless you doing something like shield charge for extra damage.
This move is the most trickiest out of all of them.
EDIT: Didn't notice this till now, I haven't mention how to know where the laser for this skill will begin. The tell for this is a faint pink trail that shots out of her to the wall. If you see this you should get away from this trail.
Depending on you position will charge the difficulty of avoiding this move by running through the wall. Simply walk on the way with proper timing, best position would be where the attack does a 180 and you can swap side, but if you find yourself in a position where you can't have the 180 degree and have to work with a degree lower then then be careful when swapping side. I suggest iframing while going through the wall just to be safe.
You can also just iframe near her body to get to the other side, you don't need long iframe to do this and is probably safer then just using the wall to avoid this. You can see my Delia using this trick while optimizing my damage output.

QTE, the best way to approach this is the do each side by themselves. So start with A or D then do the other. Pretty simple.
First time succeeding this will give you the breakoff.
If you fail your hp will go down to single digits.
If you fail or succeed you will now have collision with your teammate, dead or alive body annoying but have to deal with it.
You can dodge this move, if your damage is really good do this. If your damage isn't that great it best not to dodge this move.
EDIT: forgot to mention, if you have high ping, lag or bad connection to the host it best to avoid this move. High ping make it almost impossible to clear this.
Forgot to add Two Hit big AOE attack will add it later.


Comments
All of Blood Lord attack will inflict Bleeding Debuff aka Open Wound.
Karok Howl can get rid of this Debuff for all player in the party while giving a nice small hp regen. Both Pillar and Cetus Karok can use this skill,
1. Intro
2. Single Hit Spin attack
3. Multiple Hit Homing Spin Attack
He'll do a spin attack that will home in at one player, you can block this.
This attack is not Super armor or slashing high friendly so be careful unless you want a quick death. Good Luck Hurk and Pillar Karok.
side to side dodge trick
This is one of the easy way to dodge this skill if you don't have a block move.
4. Float In Air Invulnerable Move
Fiona can sit and hold their reg block. You can run around the out side to avoid this attack. You can spam dodge to avoid this attack. For Staff Evie you can use amber to avoid damage from this attack, just gatta be careful with the timing when getting out and back into amber.
5. Lunge into Hug attack
6. Teleport Behind Single Attack
7. Teleport Behind Multiple Attacks
8. Teleport to Starting position Mechanic
He'll Teleport to the starting position and flood the floor with blood, this will put a slow debuff on the player and once the liquid turn red starts to deal damage.
To avoid this simply clime a pillar.
Multiple Character can be on a single Pillar.
For Delia, the slow debuff counts as a hit thus your vigor stack will decrease quickly because each of the slow debuff have really low debuff timer. So I advise you to quickly clime a pillar to avoid losing vigor stacks.
Staff Evie with 30+ attack speed can cast Rage Conductor and iframe this move then rain a ray of deep in your wake.
Cross Gun kai, this is the best time to use Active: Bolt Storm.
damage taken
9. Quick Double Slash Attack
10. Quick Back Slash Attack
11. 5 Lunge Attack
12. Spit Blood Attack
Blood Lord will spit blood out of his mouth to one of the player.
To avoid run in a circular motion or run behind him.
If hit by this move, you will gain the Infection Debuff.
When under this effect you can spread this to your teammates. I advise you to avoid getting near your teammate to prevent needless spreading of this debuff.
Karok Howl can get rid of this Debuff for everyone in Party while giving a nice small hp regen buff.
Also unlike the original, you wont get hit by being close to him like the original run.
13. Double Lunge Attack
14. 5 Slash Attack
15. Teleport Grab Blood Drain
He'll do some random motion teleport then Lunge at a player grabbing them and draining up to 6k of the player hp. If you have less then 6k hp he'll drain you till you have 1 hp.
So the drain will last a short time if you have little hp. Don't merc pot during this move do it after, unless you just want him to regain more hp.
Dodged
There two way to avoid this attack, one is to spam dodge and pray, work for alot of people.
Second way is to wait for him to Lunge then dodge, pretty much delay your dodge when he appears.
For Staff evie to avoid this simply clime a pillar when he appears.
For Twin Sword Vella just cross cut this attack.
For Fiona just shield bash this attack with method number 2 version or shield charge if you can.
16. Spin Charge Attack Two Hit Attack
This attack seem to hit multiple time so it not Slashing High or Super Armor Friendly so be careful.
1. Intro
2. 4 Hit Combo Big AOE
3. First Phase Over the Head Single Hit
Fiona need to perfect Guard this attack or heavy stander it.
4. First and Second Phase Two Hit Combo
5. First and Second Phase Back Slash
6. First Phase Mechanic Success
This mechanic, you have to keep attacking his body to get him out of this and prevent him from buffing himself.
You can attack his side or back, if you attack his shield you'll do 1 damage each his.
He does three attack, I didn't provide the video for this.
First attack, shield bash: if you standing infront of him and attacking he'll attack you with a shield bash.
Second if you're attacking him from behind but slightly to his left he'll swing his shield behind him, this is blockable and iframeable.
Third attack if you're behind him and slightly to his right he'll swing his axe at you this isn't blockable, might not be iframable not sure.
7. First Phase Mechanic Fail One
This is his chasing move, if you're far from him he'll throw his shield at you and charge you down. He does this anytime, this is the noob ranger killer for this run. Those fresh new kai, staff evie, sylas die every time to this.
To avoid this simply stay mid range, staying near him yet out of his attacking range will prevent him from using this skill on you, hope you ranger doing this for the first time wont die to this attack :rolleyes:
8. First Phase Mechanic Fail Two
If you fail to do enough damage or too scared of him countering you for you to do damage this will happen ^^'
9. Second Phase Started
Once you get past 8 bars.
10. Second Phase Three Hit Combo
11. Lure into Catapulted Boulder
Free dps if done during a run, what more can I say. Well it a little buggy at time but works. Check Third phase to see what I mean.
12. Charging Energy Range Attack Melee Range AOE
Does little to no damage to people in melee range, can be blocked or dodged. Does alot of damage to people in far away, can be blocked or dodged.
13. Second Phase Mechanic Zeca Kick
Kicks you then axe you. Your hp goes down to single digits.
Teammate can save you using two spears to his right arm or using 1 chain to his right arm.
When using chain i aim around where the video shows, around his right elbow, i confirm with my title partner that it the gloves that is the spot tp hit. Look at the video to make sure..
14. Second Phase Zeca Charge Attack
15. Third Phase
Start at around the last bar.
He gain an attack speed buff.
All his move become unblockable or smashes (one of them ^^'), thus needing to do perfect guard to block this with staff Evie, Fiona. For Arisha and Delia, you're fine, their block work like normal.
During this phase Vella can't use cross cut.
EDIT:Pillar Karok and Hurk can "perfect dodge" during this phase but karok cannot absord shock during this phase. So time to practice your "perfect dodging" ^^. thx to Ranunculus for the info
Lynn, after a patch, can use Little Rat during this phase, she couldn't before but no need to worry she can now